Manage your Drupal site
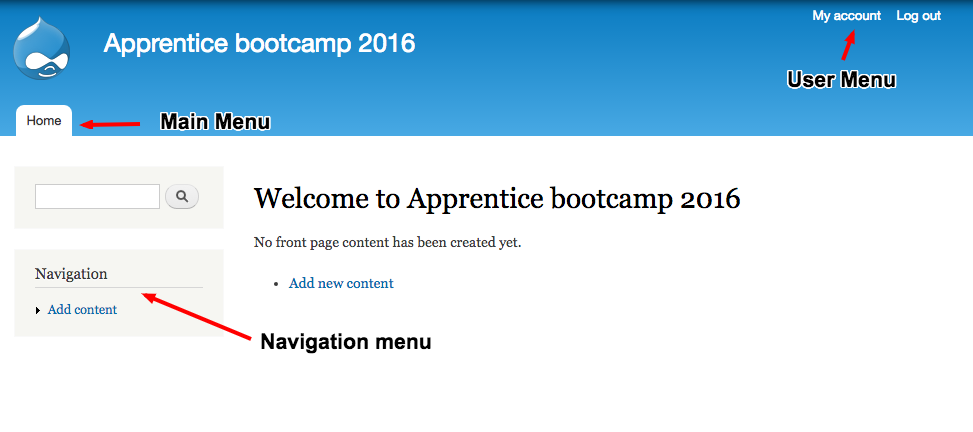
A. What's a node again?
A ‘node’ is a piece of content on a Drupal site, if you’ve set your site up and created a page or an Article then you will have created a node already! To go over this process again, and to learn more about some of the options you have when creating nodes:
- Watch: Content types in Drupal 7
B. Menus
Menus are a fundamental part of most websites. Drupal comes with a powerful system of managing menus out of the box. There are a set of default menus but you can create any number of additional ones.
Default menus
C. Create some content
Now we’re going to add some nodes with menu links, out of the box Drupal comes with two different ‘Node types’: Articles, and Basic Pages:
Create some Articles
- Add two new Articles to your site.
- Make one of them unpublished
- Then publish it from the content administration page
Add some dummy pages with menu links
Now, we’ll enable the Navigation menu in the Basic Page content type, create a page with a menu link in the Navigation menu, and then create another page as a child of the first.
Go to Structure -> Content Types and click on ‘edit’ for the Basic Page content type.

Enable ‘Navigation’ in ‘Available menus’
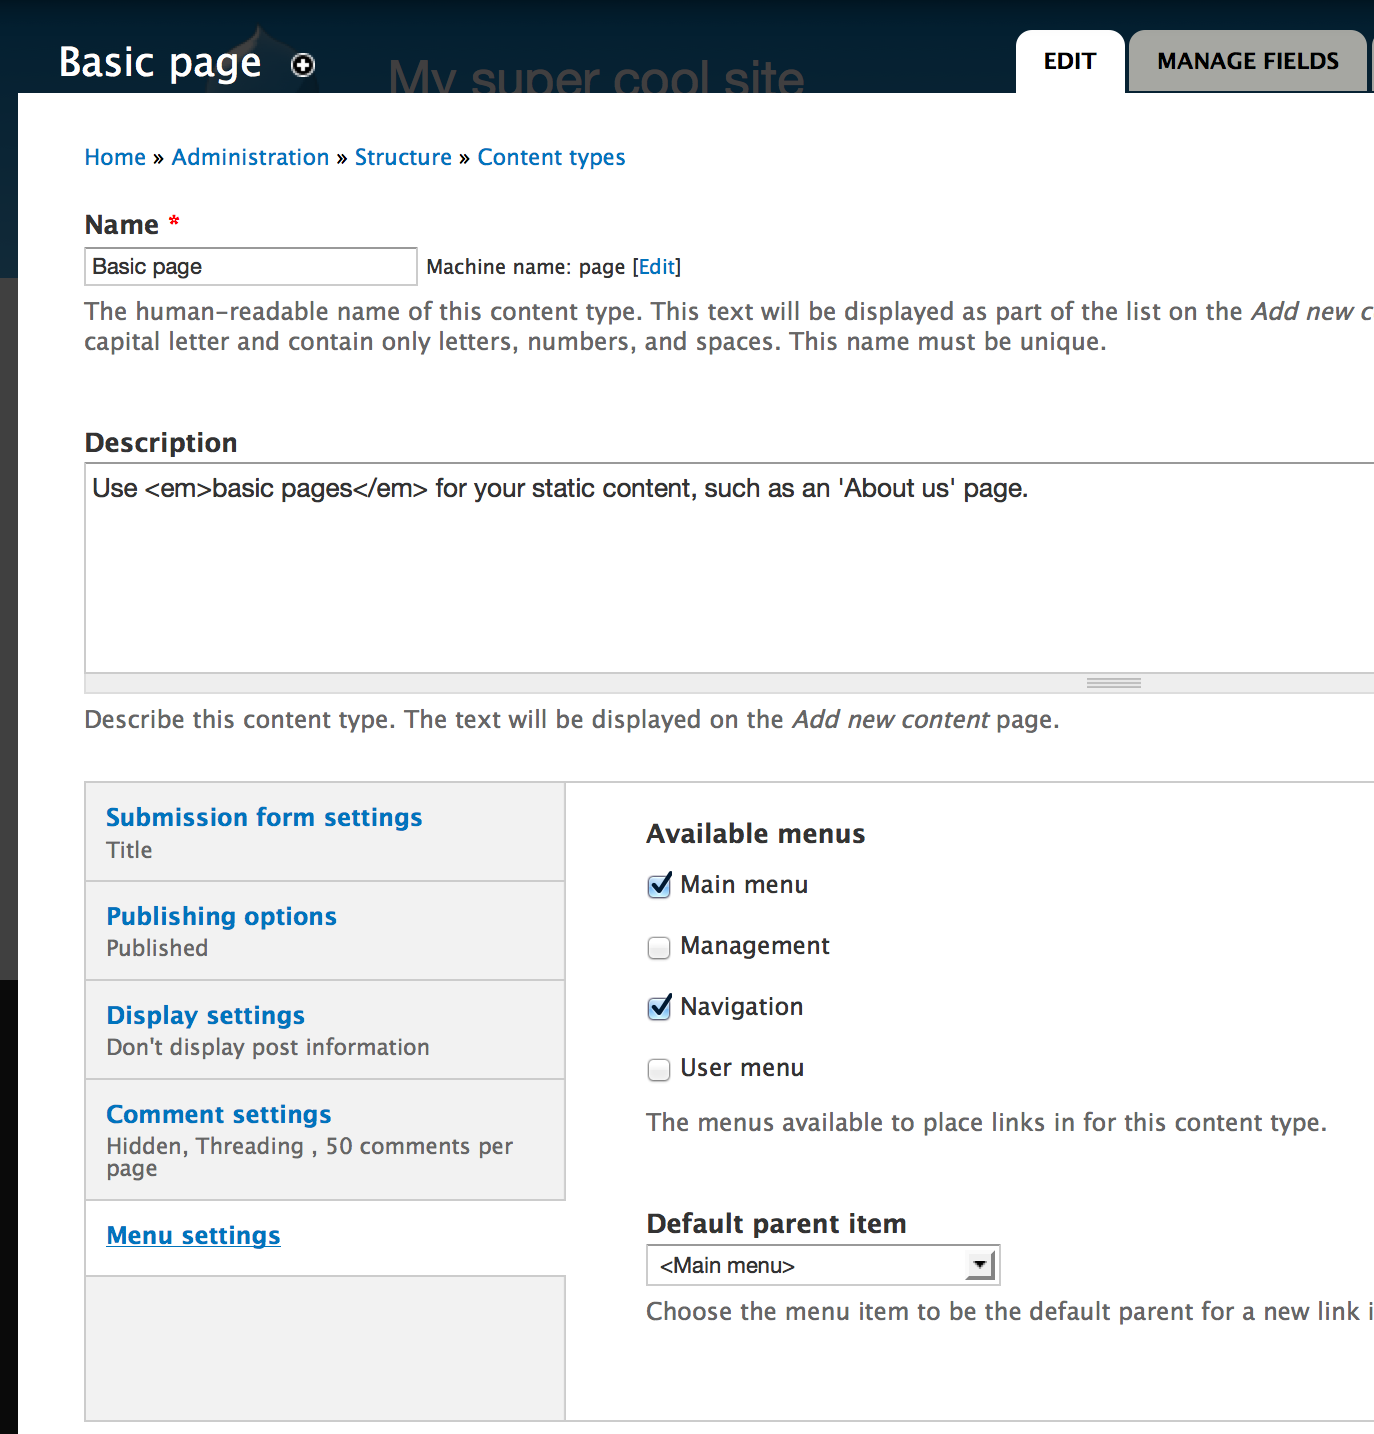
Now, add a basic page and call it something like Test page 1, under ‘Menu Settings’ select ‘Provide a menu link’, and select <Navigation> as the Parent item
Now, add another Basic page, this time call the page ‘Experience’. Add a menu link and select the ‘About me’ page you just added as the Parent item.
To manage menus within your site, go to ‘Structure->Menus’ - can you think of a better structure for the menus in your site? Go ahead and move menu items around.
D. Taxonomy
When we want to categorise content we can use the ‘Taxonomy’ system that Drupal comes with.
Set up a new Taxonomy
As we add more and more Articles to our site, it could be useful to ‘group’ them together in similar subjects. We can do this with Taxonomy.
Add a new vocabulary
- Add a new taxonomy vocabulary, call it ‘Post categories’
- Add a few terms within this vocabulary which will be the main topic areas of your site (e.g ‘Drupal, Wordpress, Front end, Back end, Bootcamp project, Daily record’)
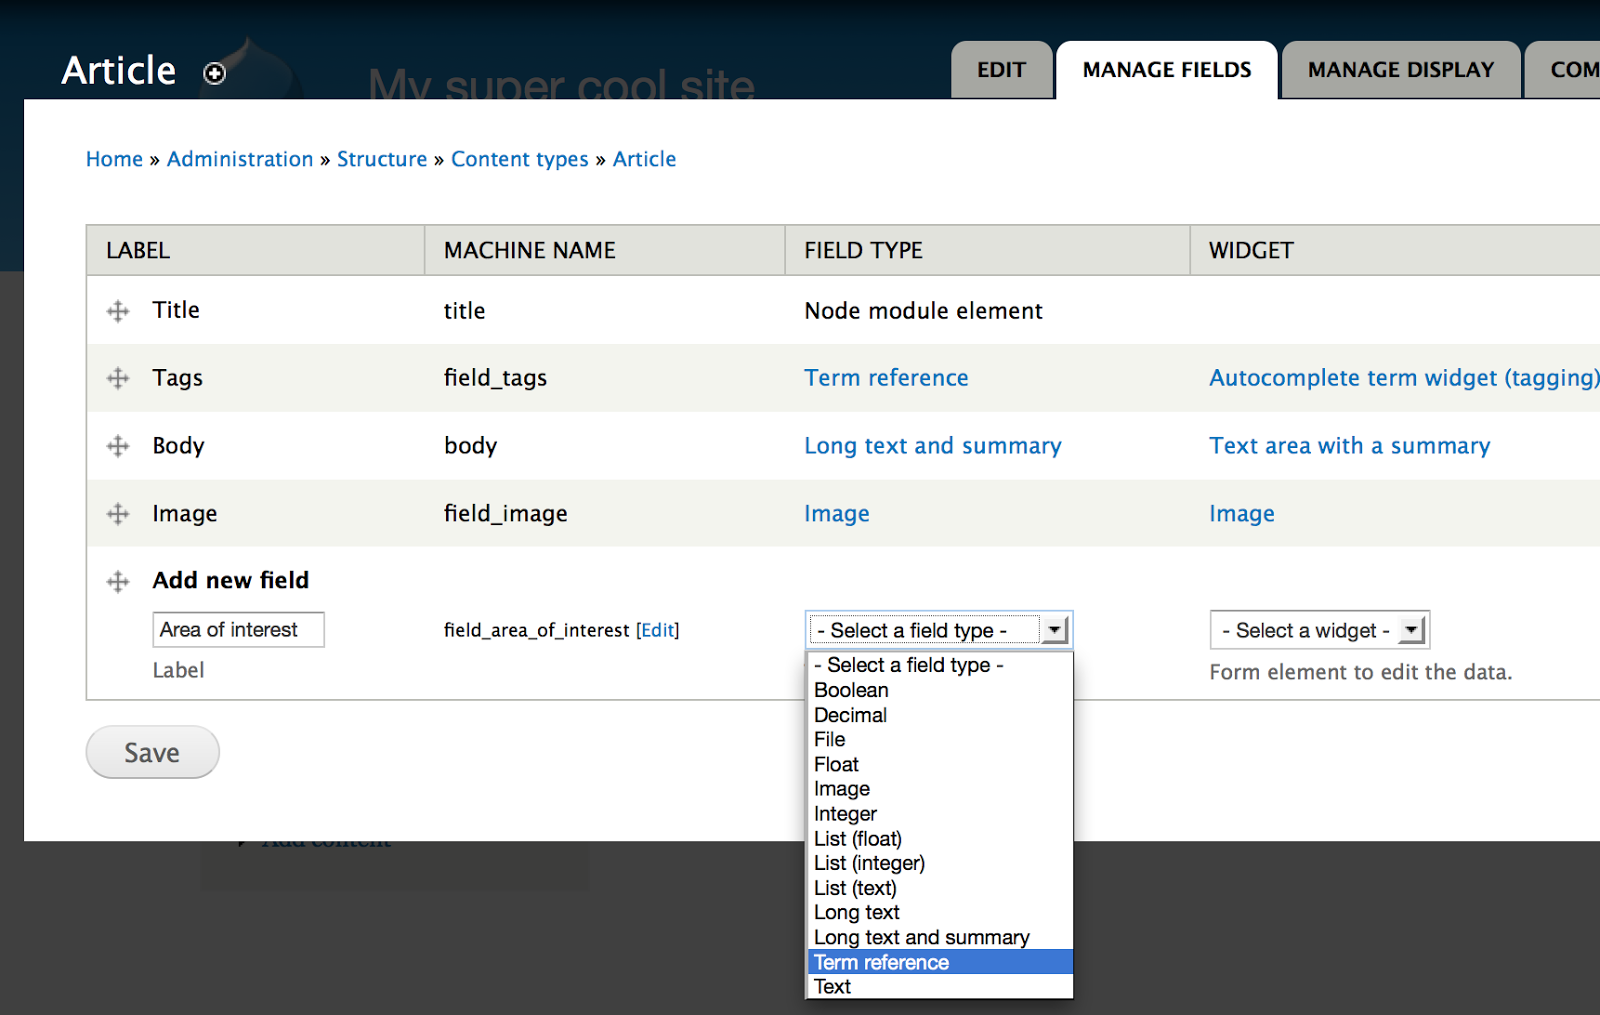
Add a term reference field
- Go to Structure->Content Types and Manage Fields for the Article Content Type
Add a new field. Call it ‘Post category’ and select Term reference as the Field Type. Chose Select List for the widget.
Click ‘Save’
Now select ‘Post categories’ on the field settings page for the Vocabulary and click save.
On the next page we can leave all of the default values as they are so click save.
Now, when we create a new Article we’ll have the option to categorise by the main topic of the post.
Categorise our content
- Create a few more dummy blog posts and pages (you can use a lipsum generator for dummy content) and categorise them by selecting the ‘Area of interest’ for each of them
- Now, when viewing the blog posts you can click on an Area of interest and see other blog posts with the same Taxonomy terms