Set up your Drupal site
What we’ll be doing
Now we’ve learnt about the advantages of Drupal we’ll dive straight in and set up a site. We’ll be using a cloud-based hosting provider called Pantheon. This will allow us to get a website up and running very quickly. Pantheon provides a full developer interface, we don’t need to go into detail about everything we can do with this though, we just need to get our site up.
In the next step we’ll go through installation of our site, take as much time as you like, ask questions to any mentors or other participants and read up as much background information as you like.
Step 1: Get a Drupal site setup
If you want to get a Drupal site up and running you’ll need access to a properly configured web server with a copy of Drupal installed. We could do set this up on our own computers, but this can take a bit of time. Lucky for us there’s a cloud service called Pantheon which provides web hosting and developer tools for Drupal and Wordpress websites, and you can sign up for free.
- Head over to Pantheon and sign up. Make sure you take care to note down your login details.
- Once logged in navigate to the Pantheon dashboard and create a new site
- Chose a Drupal 8 site
 1. Give your site a name ~ something like Your Name's Apprenticeship Blog

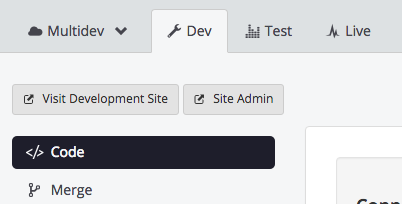
- Once the new dev site is deployed, the next step is to click the ‘Visit development site button’ where you’ll be presented with the Drupal installer.
- Chose the standard settings and fill out the form, page by page
- By the end you’ll have a fully working Drupal site!
 Congrats! You now have a Drupal website :) When you’re on your new site you should be logged in and see a black toolbar at the top of the page. If you can’t see this, you can always login by filling out the login form on the homepage and use the Username & Password you specified in the ‘Site maintenance account’ section of the installer.
Step 2: Hello World! - create some content
Create some pages
Now comes the fun part, we’re going to see how powerful a CMS is by creating a new page with just a few clicks.
- Find the ‘Add content’ link (HINT: Click the little triangle in the top right) and create a new Basic Page, fill in anything you like in the ‘Title’ field, and add some dummy content into the ‘Body’ field. Try adding a menu link when creating the page to be able to easily navigate to it (HINT: check ‘Provide a menu link’ in the tabs at the bottom). You can add as many pages as you want, and call them anything you like! To edit a page you just need to visit it, and click the ‘Edit’ button
Create some blog posts
So now we have our own website up and running and we know how to add pages, the next step is to add some posts. We’ll do this using the ‘Article’ content type that comes with the default installation of Drupal.
- Add a few Articles, filling in dummy content for the title and body sections Try adding some tags when creating the article’s, you’ll be able to click on tags and see everything with the same tag after you publish the content Navigate to the homepage of your website, and you should see the Article’s you’ve just created
Checkpoint
- Write a short Hello World! blog post announcing that you have set up a blog - add a screenshot of the homepage2. Write a blog post about Drupal, and the other technology your website uses, add this blog post to your site. If you have already written a blog post on this subject, copy the content into your site.3. Make sure you have created at 4 or 5 pages and 4 or 5 articles on your site - dummy content is fine
Backup Backup Backup
Always remember to backup your work regularly, this is really easy with pantheon, click backups from teh left menu on the sites dashboard on pantheon and click backup.